You spend months developing a promising material or biological sample. Your mass spectrometry analysis returns a cluttered spectrum filled with noise, suppressed signals, and missing peaks. The problem is not your instrument or your molecule. It is your sample preparation. Contaminants from buffers, incomplete protein digestion, or residual salts can mask the data you need, turning what should be a straightforward analysis into a frustrating troubleshooting exercise.
Optimizing sample preparation requires a systematic approach tailored to your specific analytes and matrices. The key is understanding which steps matter most for your application, whether you are analyzing proteins in biological tissues, characterizing pharmaceutical compounds, or evaluating advanced materials. When you get the fundamentals right from lysate preparation through final cleanup, your MS data becomes clearer, more reproducible, and easier to interpret.
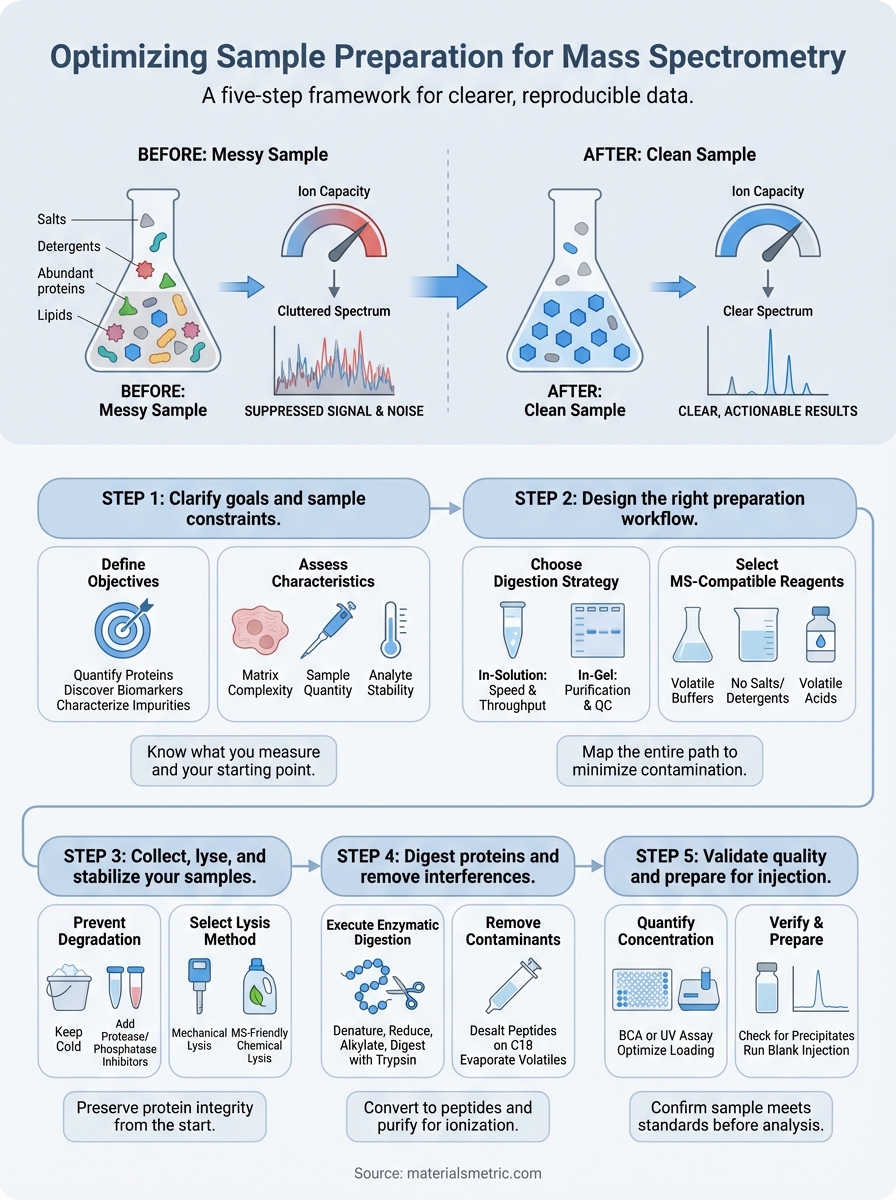
This guide walks through a five step framework for sample preparation that consistently delivers high quality mass spectrometry results. You will learn how to define your analytical requirements, design an appropriate workflow, execute critical preparation steps, and validate sample quality before injection. Each section includes practical recommendations based on proven protocols that work across diverse applications.
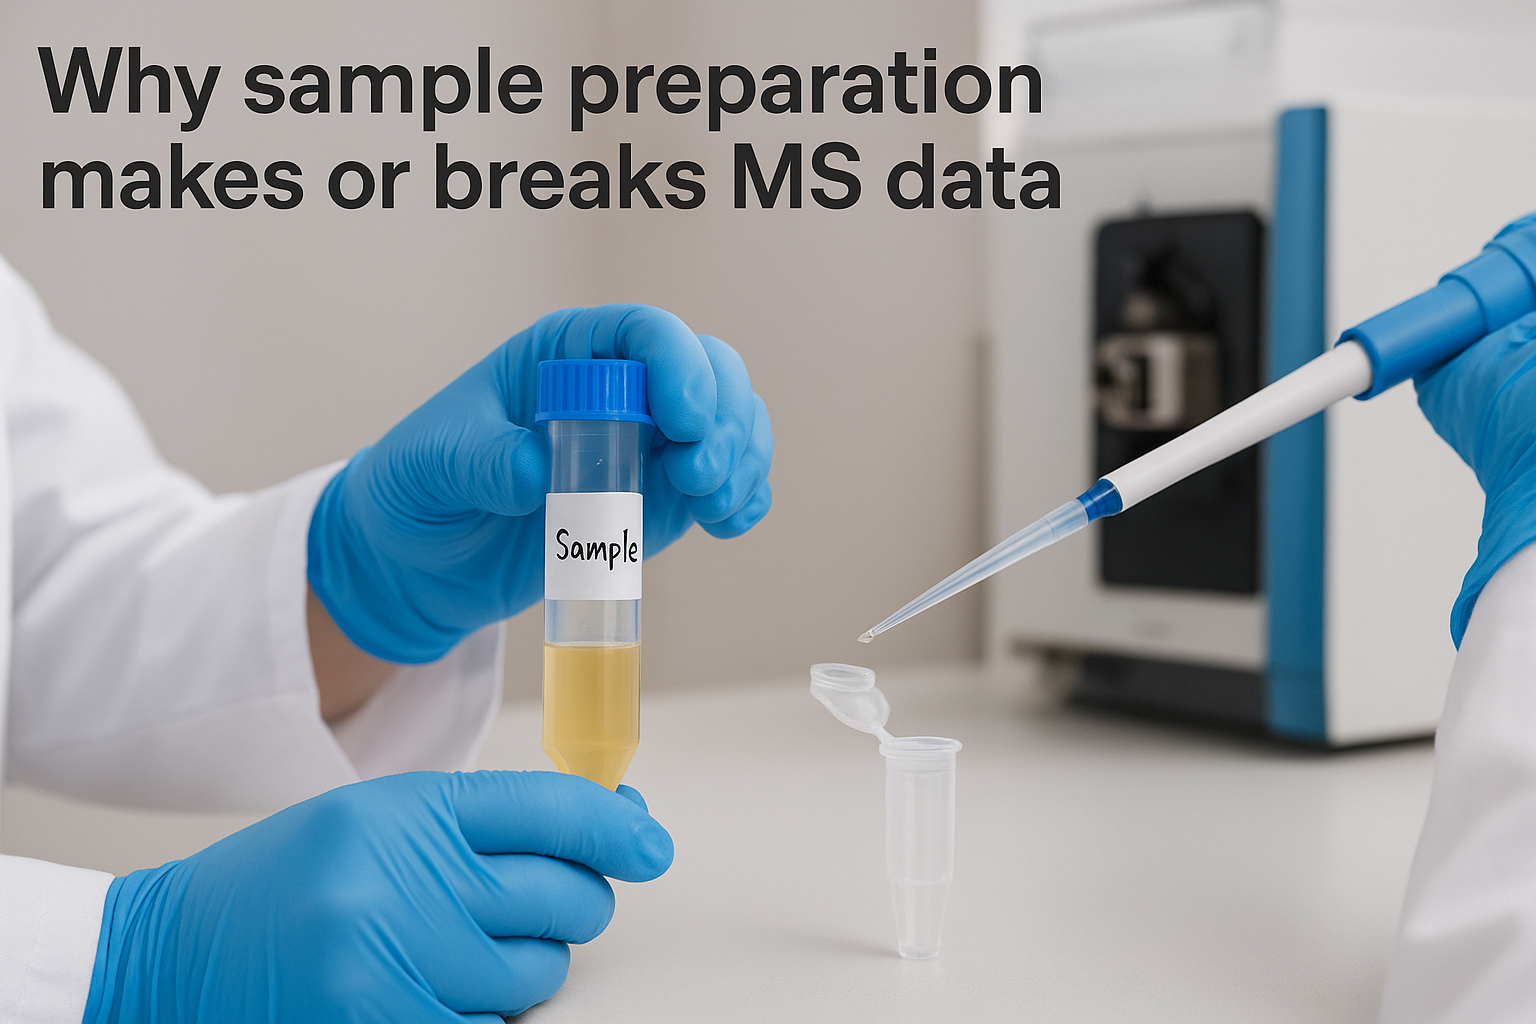
Why sample preparation makes or breaks MS data
Mass spectrometry detects ions based on their mass to charge ratios, which means every component in your sample competes for ionization. When you inject a sample containing salts, detergents, or other contaminants alongside your target molecules, these substances can suppress the signal from your analytes or create overwhelming background noise. Your instrument has finite ion capacity, so abundant interfering compounds literally prevent lower concentration molecules from being detected. This competition effect becomes particularly severe in electrospray ionization, where buffer salts like sodium phosphate can dominate the spectrum and mask the peptides or metabolites you actually want to measure.
Sample complexity directly determines your detection limits and reproducibility. Biological matrices like serum or tissue lysates contain thousands of proteins spanning ten orders of magnitude in concentration. Without proper fractionation or depletion strategies, high abundance proteins flood your detector while rare biomarkers remain invisible. Similarly, incomplete protein digestion generates peptides with missed cleavages that split your signal across multiple forms, reducing the concentration of any single peptide below your detection threshold. These preparation failures cascade through your entire workflow, producing spectra filled with uninterpretable peaks and missing the critical molecules that answer your research questions.
Proper sample preparation for mass spectrometry reduces background interference and concentrates your analytes, transforming noisy data into clear, actionable results.
The quality of your preparation work determines whether you measure five hundred proteins or five thousand in a single run. Small changes in lysis efficiency, digestion completeness, or cleanup protocols create dramatic differences in data quality that no amount of instrument optimization can overcome later.
Step 1. Clarify goals and sample constraints
Your sample preparation strategy depends entirely on what you need to measure and what you are starting with. Before you touch a pipette or select a buffer, define your analytical endpoints. Are you quantifying specific proteins at known concentrations, discovering novel biomarkers in a complex matrix, or characterizing chemical impurities in a pharmaceutical compound? Each objective requires different preparation approaches. A targeted assay measuring three kinase proteins demands different cleanup than a global proteomics experiment seeking to identify five thousand proteins. Write down your exact measurement goals and expected analyte concentration ranges before proceeding further.
Define your analytical objectives
Start by documenting your target molecules and required sensitivity. If you need to detect proteins at femtomolar concentrations, you must concentrate samples and remove every possible interfering substance. Conversely, abundant proteins at micromolar levels tolerate simpler, faster preparation protocols. Identify whether you need absolute quantitation with internal standards or relative quantitation comparing samples. Your choice determines whether you add stable isotope labeled peptides, implement metabolic labeling, or use label free approaches. Record your target identification rate, such as identifying two thousand unique peptides per ninety minute analysis, because this benchmark guides your digestion efficiency and cleanup stringency requirements.
Define specific numerical targets for sensitivity, protein count, and analysis time before selecting your preparation methods.
Consider your downstream data interpretation needs as well. If you plan to compare multiple sample groups statistically, you need highly reproducible preparation that minimizes technical variation between replicates. When characterizing post translational modifications like phosphorylation, your workflow must include enrichment steps using titanium dioxide or antibody based pulldowns that would be unnecessary for basic protein identification.
Assess your sample characteristics
Document your starting material type and expected complexity before selecting protocols. Cultured cells require different lysis approaches than frozen tissue biopsies or formalin fixed paraffin embedded samples. Blood serum contains albumin and immunoglobulins at concentrations one million times higher than potential biomarkers, demanding depletion strategies. Bacterial lysates have simpler proteomes than mammalian cells, allowing shorter gradients and less fractionation. Your matrix directly determines which interferences you will encounter during sample preparation for mass spectrometry.
Estimate your available sample quantity and analyte stability. If you have only fifty micrograms of tissue from a needle biopsy, you cannot afford sample losses during multiple cleanup steps. Conversely, abundant samples like cell culture pellets let you optimize aggressively, testing different protocols to maximize data quality. Note whether your analytes degrade rapidly at room temperature, requiring protease inhibitors and cold procedures, or remain stable enough for room temperature processing. These practical constraints shape every subsequent preparation decision you make.
Step 2. Design the right preparation workflow
Your sample preparation workflow must match your sample type, ionization method, and analytical goals while minimizing the introduction of contaminants. Map the entire path from raw sample to cleaned peptides before you start any bench work. A well designed workflow eliminates incompatible reagents early, reduces handling steps that cause sample loss, and positions cleanup procedures where they provide maximum benefit. The difference between detecting five hundred proteins versus two thousand often comes down to selecting the right sequence of operations rather than any single technique.
Choose your digestion strategy
In-solution digestion works best when you have simple samples or need high throughput. You denature proteins with urea or thiourea, reduce disulfide bonds with TCEP or DTT, alkylate cysteines with iodoacetamide, then digest with trypsin. This approach lets you process many samples simultaneously and automate the entire workflow. Use in-solution digestion when your sample amount is limited because gel extraction causes significant peptide losses. The downside is that detergents and salts remain in your sample unless you perform additional cleanup.
In-gel digestion separates proteins by SDS-PAGE first, giving you visual confirmation of protein abundance before you commit to mass spectrometry. You excise bands, destain them, then perform reduction, alkylation, and digestion within the gel matrix. This approach inherently removes many contaminants because the gel itself acts as a purification step. Choose in-gel digestion when you work with complex matrices like tissue lysates or when you need to analyze specific molecular weight ranges. The gel extraction step reduces your final peptide recovery but produces cleaner samples that require less aggressive cleanup.
Select in-solution digestion for speed and minimal sample loss, or in-gel digestion when you need built-in purification and visual quality control.
Map each workflow step
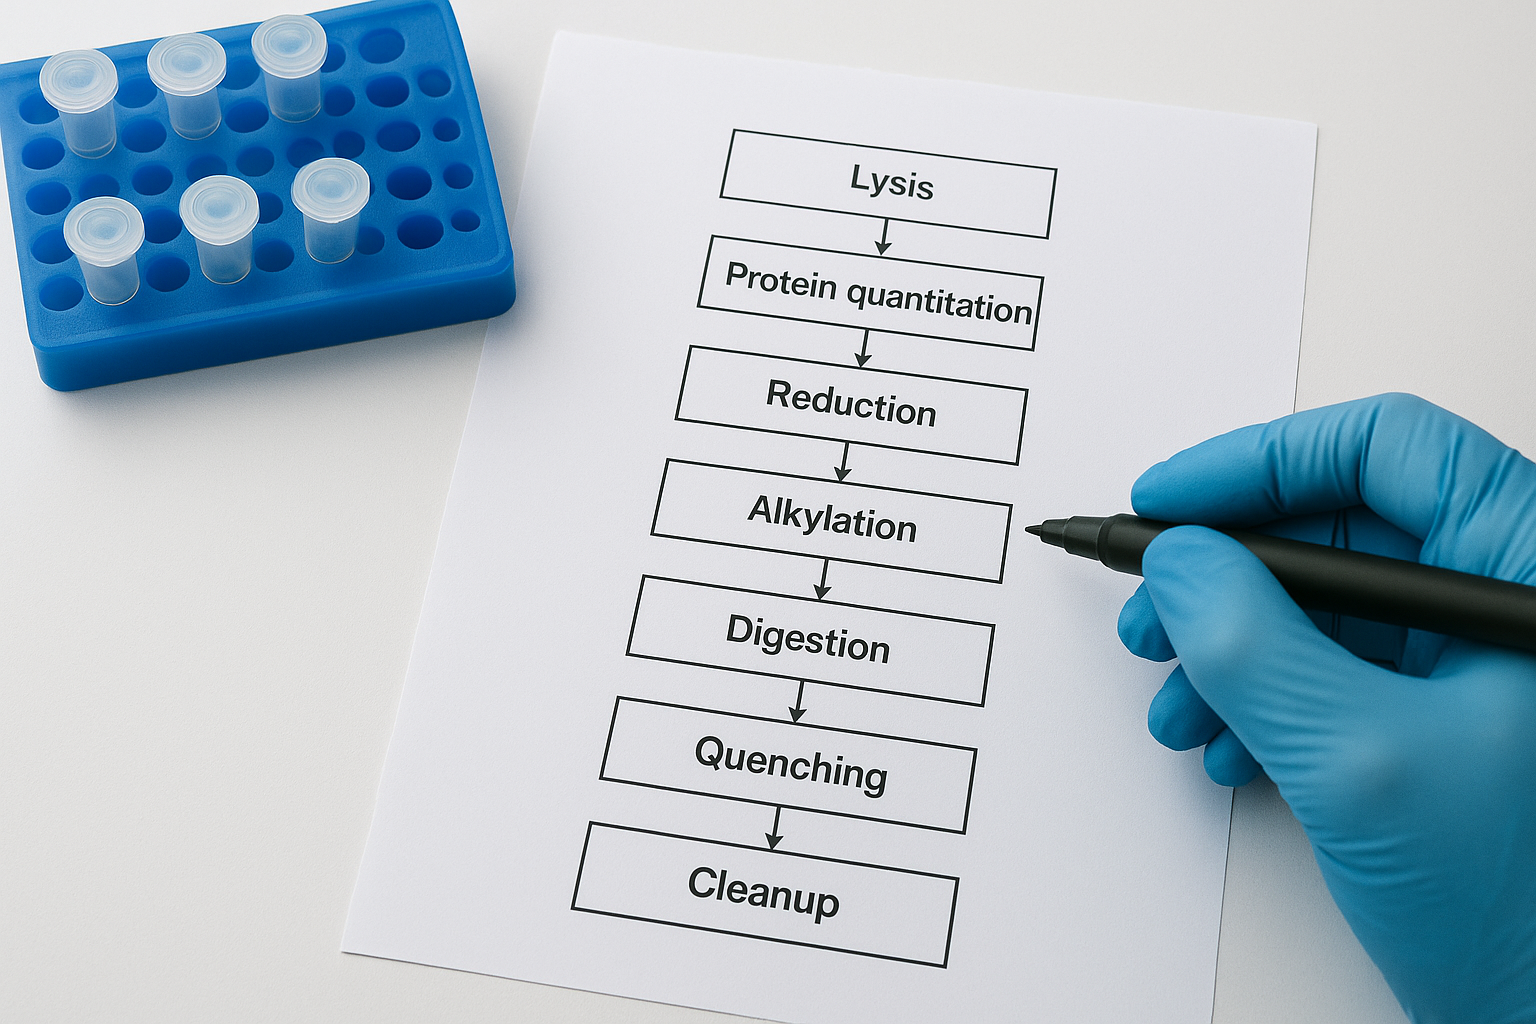
Document every operation from lysis through final reconstitution in a flowchart that identifies potential contamination points. Your workflow should minimize transfer steps between tubes because each transfer loses sample on pipette tips and tube walls. For example, a typical workflow sequence might include: cell lysis in MS-compatible buffer, protein quantitation, reduction at 56°C for thirty minutes, alkylation at room temperature for thirty minutes in darkness, overnight digestion at 37°C, quenching with formic acid, desalting on C18 tips, drying in a speed vacuum, and reconstitution in 0.1% formic acid.
Identify where you will validate progress at intermediate steps. Plan to measure protein concentration after lysis, check digestion completeness by running a small aliquot on SDS-PAGE, and verify peptide recovery after cleanup. These checkpoints catch problems before you waste valuable instrument time on poorly prepared samples.
Select MS-compatible reagents
Replace every buffer component with volatile alternatives that evaporate during sample concentration or ionize without suppressing your analytes. Swap phosphate buffers for ammonium bicarbonate, replace Tris with HEPES only if absolutely necessary for protein stability, and eliminate glycerol wherever possible. If you must use detergents for membrane proteins, choose MS-friendly options like DDM or CYMAL-5 instead of Triton-X or NP-40, which contain polyethylene glycol polymers that create overwhelming background signals throughout your chromatogram.
Avoid sodium and potassium salts that compete with peptides for positive ion mode detection. Use volatile acids like formic acid or acetic acid to adjust pH rather than sodium hydroxide. When sample preparation for mass spectrometry requires metal chelators, select volatile options or plan for thorough desalting steps before injection.
Step 3. Collect, lyse, and stabilize your samples
Your sample quality begins at the moment of collection, not when you start preparing it for the instrument. Protein degradation and unwanted modifications start immediately when you lyse cells and disrupt cellular compartments. Proteases that were safely contained in lysosomes suddenly access their substrate proteins, while phosphatases remove the very modifications you might want to study. A poorly executed collection and lysis strategy introduces artifacts, loses low abundance proteins, and creates inconsistent results across replicates that no downstream optimization can fix.
Prevent degradation from the start
Add protease and phosphatase inhibitors to your lysis buffer before you add it to your samples. These inhibitors block enzymatic activity immediately upon cell disruption. Use cocktail mixtures containing EDTA-free protease inhibitors (to avoid metal chelation issues), serine protease inhibitors like AEBSF, cysteine protease inhibitors, and metalloprotease inhibitors. For phosphoproteomics work, add sodium fluoride, sodium orthovanadate, and beta-glycerophosphate to preserve phosphorylation states.
Work quickly and keep samples cold throughout collection and lysis. Process biological samples within thirty minutes of collection when possible, or snap freeze them in liquid nitrogen for storage at negative eighty degrees Celsius. Avoid repeated freeze-thaw cycles that damage protein structure and create precipitation. When working with tissue samples, rinse blood away with cold phosphate buffered saline immediately after collection to remove abundant serum proteins that contaminate your analysis.
Select the right lysis method
Mechanical lysis methods preserve protein activity better than detergent-based approaches because they introduce fewer chemical interferences. Use bead beating for tough samples like bacteria or plant material, where rigid cell walls resist gentler methods. Sonication works well for mammalian cells and provides good reproducibility when you control amplitude and duration consistently. Homogenization with a dounce homogenizer or potter-elvehjem homogenizer gives you precise control over lysis intensity, letting you break cells while keeping organelles intact if you need subcellular fractionation.

Chemical lysis with detergents solubilizes membrane proteins effectively but requires careful reagent selection for sample preparation for mass spectrometry. Choose DDM at 1% concentration or CYMAL-5 at 0.5% when you need detergents for membrane protein solubilization. These compounds ionize far less than Triton-X or NP-40 and can be removed more easily during cleanup. Combine detergent lysis with mild sonication to ensure complete cell disruption without creating foam that traps proteins.
Add inhibitors before lysis and maintain cold temperatures throughout to preserve your proteins in their native state.
Execute cell lysis properly
Follow this protocol for mammalian cell lysis in MS-compatible buffer: Harvest cells by scraping or trypsinization, wash twice with cold PBS, pellet at three hundred times gravity for five minutes, aspirate supernatant completely, add lysis buffer pre-chilled to four degrees Celsius at a ratio of one hundred microliters per million cells, vortex for ten seconds, incubate on ice for thirty minutes with vortexing every ten minutes, sonicate at twenty percent amplitude for three cycles of ten seconds on and thirty seconds off, centrifuge at sixteen thousand times gravity for fifteen minutes at four degrees Celsius, and transfer the supernatant to a fresh tube.
Validate lysis efficiency by measuring protein concentration with a BCA or Bradford assay immediately after clearing the lysate. You should recover between 0.2 and 0.5 milligrams of protein per million mammalian cells. Lower yields indicate incomplete lysis or excessive protein loss during centrifugation.
Step 4. Digest proteins and remove interferences
Your proteins must be converted into peptides and purified before injection to generate interpretable mass spectra. Incomplete digestion creates peptides with missed cleavages that distribute signal across multiple forms, while residual salts, detergents, and buffer components suppress ionization of your target peptides. This step determines whether your instrument detects clean, abundant peptide ions or struggles with contaminated samples that produce noisy, unreliable data.
Execute enzymatic digestion
Begin protein digestion by denaturing, reducing, and alkylating your samples to ensure complete enzymatic access. Add urea to 8 M final concentration to denature proteins, then dilute to 2 M with 50 mM ammonium bicarbonate before adding trypsin (proteins precipitate if you digest in concentrated urea). For reduction, add DTT to 5 mM and incubate at 56°C for 30 minutes. Cool samples to room temperature, add iodoacetamide to 15 mM, and incubate for 30 minutes in darkness to alkylate cysteines irreversibly.
Digest with a two-enzyme strategy for complex samples to maximize coverage in sample preparation for mass spectrometry. Add Lys-C at a 1:100 enzyme-to-protein ratio and incubate for 4 hours at 37°C (Lys-C tolerates high urea concentrations). Dilute samples fourfold with 50 mM ammonium bicarbonate to reduce urea below 2 M, then add trypsin at 1:50 enzyme-to-protein ratio and digest overnight at 37°C. Quench digestion by acidifying to pH 3 with formic acid to 0.5% final concentration.
Use fresh urea solutions prepared within 24 hours to prevent carbamylation artifacts that add 43 Da to peptide masses.
Check digestion completeness by running 5 micrograms of digest on a 12% SDS-PAGE gel and staining with Coomassie. You should see no protein bands above 10 kDa, only a smear below 5 kDa representing peptides and undigested trypsin.
Remove contaminants before MS
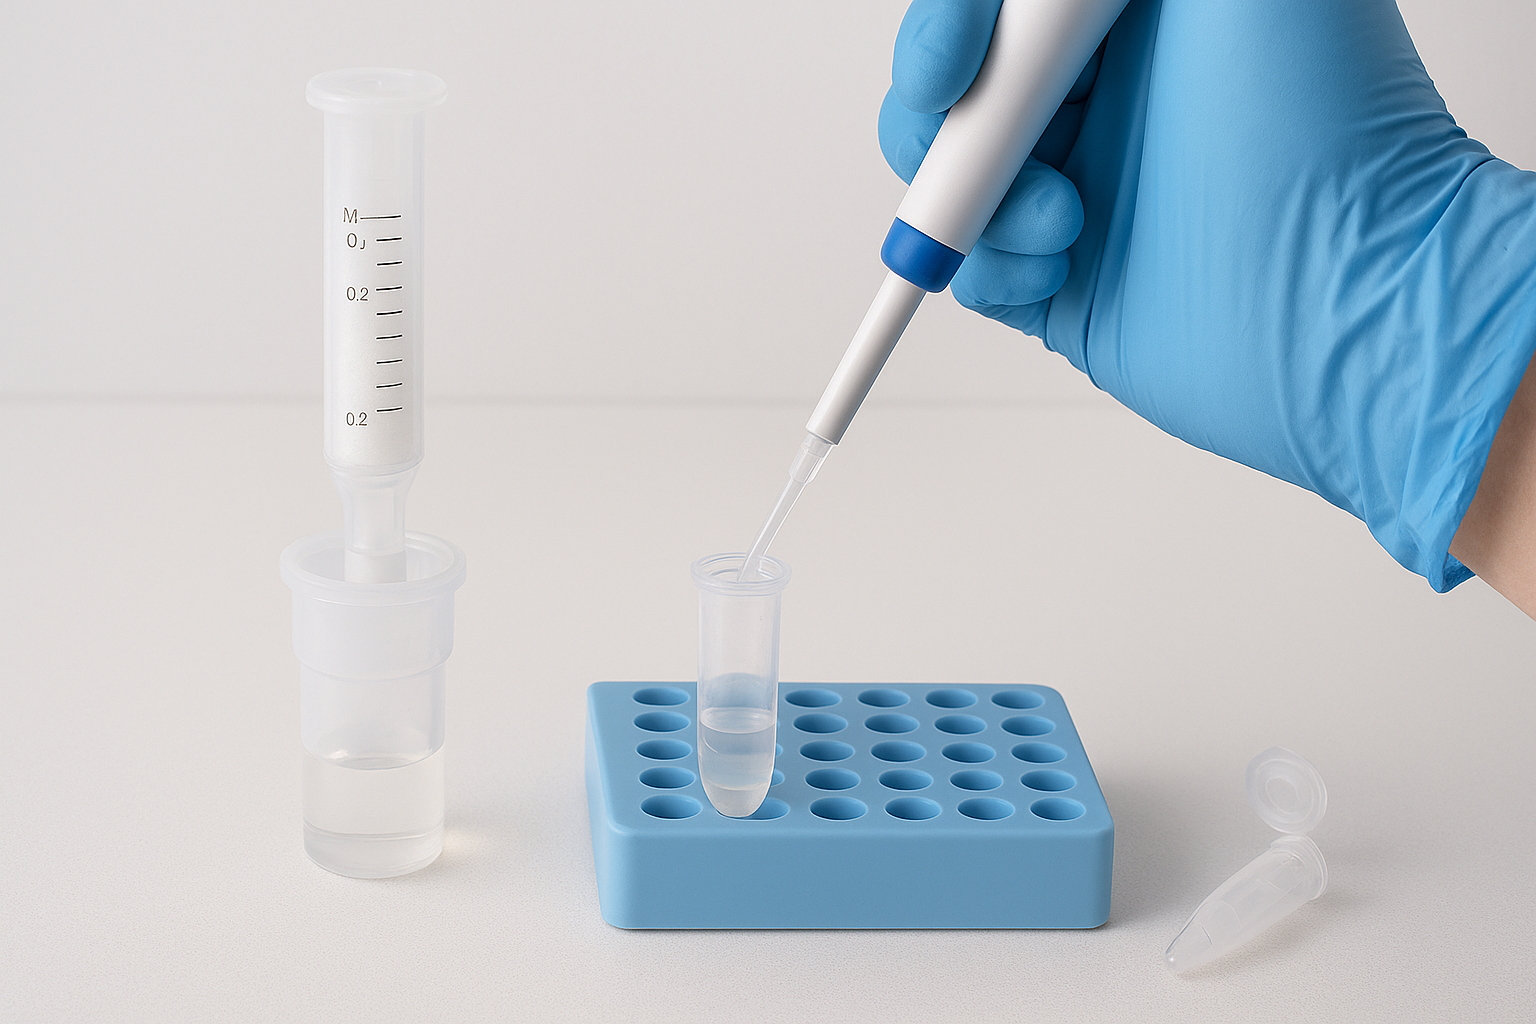
Desalt peptides using C18 solid-phase extraction to eliminate salts, detergents, and urea that interfere with ionization. Condition C18 tips or cartridges with 200 microliters of 80% acetonitrile in 0.1% formic acid, then equilibrate with 200 microliters of 0.1% formic acid. Load your acidified peptide sample slowly, wash three times with 200 microliters of 0.1% formic acid to remove contaminants, and elute peptides with 150 microliters of 60% acetonitrile in 0.1% formic acid.
Concentrate eluted peptides by drying in a vacuum centrifuge at room temperature for 90 minutes until completely dry. Avoid overdrying, which makes peptides difficult to reconstitute. Store dried peptides at negative 80°C until you are ready for analysis, or reconstitute immediately in 0.1% formic acid to your desired concentration. For typical analyses, aim for 0.5 to 1 microgram per microliter peptide concentration. Vortex reconstituted samples for 30 seconds and sonicate for 5 minutes to ensure complete dissolution before transferring to autosampler vials.
Step 5. Validate quality and prepare for injection
Your final sample must meet concentration, purity, and cleanliness standards before loading into the mass spectrometer. Injecting unvalidated samples wastes instrument time and produces unreliable data that forces you to repeat expensive analyses. A quick quality check at this stage catches contamination, verifies peptide recovery, and confirms your sample concentration falls within the optimal range for your LC-MS system. These validation steps take fifteen minutes but save hours of troubleshooting poor chromatography or missing peptide identifications.
Quantify peptide concentration
Measure peptide concentration using a BCA assay optimized for low concentrations. Prepare standards from 0.1 to 2 micrograms per microliter using bovine serum albumin digest in 0.1% formic acid. Pipette 5 microliters of each standard and sample into a 96-well plate, add 200 microliters of BCA working reagent, incubate at 60°C for 30 minutes, cool to room temperature, and read absorbance at 562 nanometers. Calculate your peptide concentration from the standard curve and adjust samples to 0.5 micrograms per microliter for injection.
Alternatively, use UV absorbance at 205 nanometers for rapid estimates when you work with clean samples. This wavelength measures peptide bonds directly without requiring reagents. Blank your spectrophotometer with 0.1% formic acid, measure your sample, and apply the extinction coefficient of 31 milliliters per milligram per centimeter to calculate concentration.
Validate your final peptide concentration before injection to ensure you load enough material for detection without overloading your column.
Verify sample cleanliness
Check for residual contaminants by running a blank injection of your reconstitution solvent through your LC-MS system. If you see peaks in this blank run, your solvent contains contaminants. Prepare fresh 0.1% formic acid in LC-MS grade water. Inspect your reconstituted samples visually under good lighting. They should appear clear without visible particles, cloudiness, or precipitate that indicates incomplete dissolution or protein aggregation.
Prepare autosampler vials correctly
Transfer 80 microliters of your sample into a 200 microliter polypropylene autosampler vial with a 100 microliter glass insert to minimize sample loss from dead volume. Use vials specifically rated for sample preparation for mass spectrometry to avoid polymer contamination. Cap vials immediately with pre-slit PTFE/silicone septa to prevent evaporation. Load vials into your autosampler and maintain samples at 4°C to prevent degradation during queue time.
Label vials with injection order, sample ID, and concentration using solvent-resistant markers. Plan to inject samples within 24 hours of reconstitution for maximum peptide stability.
Bringing it all together
Successful sample preparation for mass spectrometry requires systematic planning from collection through injection. Each step in your workflow affects data quality, and shortcuts at any stage create problems that compound downstream. Your investment in proper lysis techniques, complete digestion, and thorough cleanup directly determines whether you identify five hundred proteins or five thousand from the same starting material.
The protocols in this guide give you a framework that adapts to different sample types and analytical goals. Start by defining your requirements clearly, select MS-compatible reagents from the beginning, and validate your samples before instrument time. When you encounter complex matrices that demand specialized expertise or face tight deadlines that require validated protocols, consider partnering with an experienced analytical laboratory. Materials Metric provides expert mass spectrometry services backed by ISO-accredited methods and scientists who understand the nuances of sample preparation across diverse applications.